Selasa, 03 November 2015

My Top 5 tips for a frugal wedding, Missy and Oliver 2015!


I'm still getting used to the fact that I have a daughter that is married. Hey at least I have made it down to her old bedroom multiple times now and boxed up her stuff and made extra room for her Little Sister's stuff who she shared a room with. Charly felt it was time to make a place to keep her books in her room so Missy's had to go. ;)


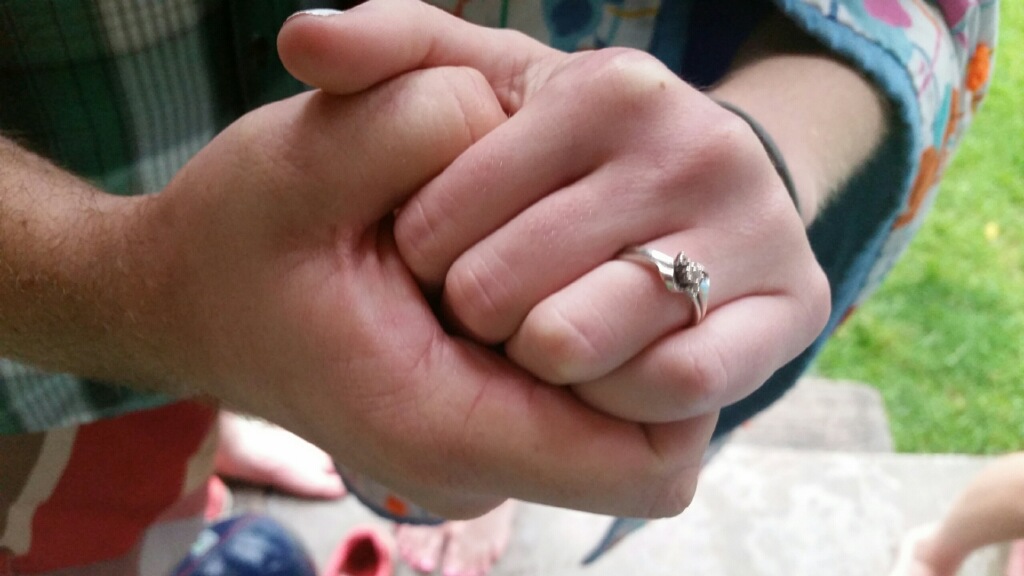
It's been a while since I have posted.....longer than usual.....I think I'm just trying to find a new groove that works for me and to just breathe a bit after all the excitement this Summer/Fall.  That being said we are so thrilled for the new life and adventure that Missy and Oliver have chosen to spend eternity together on. Missy has found a superb guy in Oliver and we just adore him. They are such a great couple!

The day was simply beautiful and all things considered I was surprised how amazingly calm that not only I was but Missy too. Everything about the day was beautiful and even better we hadn't spend thousands of dollars yet it was all very special and beautiful.


Missy has always said she wanted a simple dress and wedding but when we looked through what she felt she wanted and set a budget of less than $1,000.00 I wasn't sure we would be able to pull it off but it seemed doable.  Looking back I realized if we had known better what to expect (this was our first one after all) we could have even cut the budget even more.

Here are our Top 5 Tips for a Frugal Wedding:


  • #1 The Dress
The wedding dress can be a big budget breaker and depending on the style you want the prices can be all over the place. Making your own can save a bunch and even though we had access to amazing seamstresses and I'm not afraid of using a sewing machine we didn't have much time and most of us were just too busy so we feel we had that for an option. But one of Missy's friends, who was married just weeks before spent less then $90 on a dress because her Mom made it for her.

Borrowing or renting a dress can also save a bunch of money but with dry cleaning etc. it can be kind of pricey...but still cheaper then buying it.

The other way is to just keep it really simple....Missy has never been super into fluffy or frilly dresses (very different from her Mother) and she wanted one that she could wear back to the temple, she's really practical like that. So we went looking and right here in our home town dress shop we found one that fit the bill and just happened to be on clearance for 50% off! We paid less than $65.00 for her dress and she looked beautiful!

  • #2 Design your own Announcements
In this time of digital photography and blogging it seems everyone has a little experience with photo editing and design. I had done enough of it that I felt confident that I could design a pretty decent looking announcement. I am not a graphics designer but I had used PicMonkey enough to know that simple free online program could do what I needed it to do. Missy told me what she wanted and we found some cute ideas online and went from there.


  • #3 Have your Best Friend Take the Pictures
Photography and photos can often end up being the largest expense of a wedding and no doubt it's probably worth it....but if you are on a tight budget and happen to know someone who has been studying and practicing photography for a while and is just getting into learning weddings and wants to "practice" for a great deal or even free it may be the perfect fit. Kenzi Kim Photography fit the bill for us....not only did she happen to be Missy's best friend but we had seen her work and even had her do our family pictures the year before. We knew she would be perfect. All of the photos on this post were done by her I think you will agree.


  • #4 Ask for Help From Family and Friends
It was amazing the amount of people who were asking how they could help....I'm not one that is really very good at asking for help but since I have never been much for throwing a big party I knew there were many others who could help me pull this off. So I asked for ideas created a pinterest board called The Big Day that others could pin on.....and we made our plan.

After brain storming and figuring out where we could get the stuff we need without having to purchase much we borrowed bushel baskets, bins and other old fashions items from Ryan's parents. We also planned to use their back yard to have the wedding but the weather did not cooperate. Our Parents and other family members helped out in the kitchen with the serving.

A dear friend and one of my Sisters-In-Law took care of the majority of the decorating (it was amazing) using mainly simple things we borrowed and their amazing artistic skills.

Tons of family and friends showed up to help with so many little things and with the clean up. We had never felt so much love and support. I hardly had to worry about a thing!


  • #5 Use In-Season Wild Flowers and Forget the Cake
Sunflowers happened to be blooming everywhere and we knew they would be, barring some super early unforeseen frost (stranger things have happened)......and since they went perfect with the theme and didn't cost a cent it was a simple solution. Although I didn't realize how absolutely amazing they would look! Missy didn't want to be bothered with holding a bouquet but I'm sure we could have figured out something nice and cheap with the sunflowers too. 

Maybe it isn't sunflowers that are blooming for you but if you look around you may find other equally cute or even more beautiful growing wild where you live. Or maybe you have your own rose garden that you know will be in peek bloom. Flowers can be pricey but Mother Nature has beauty in abundance.

And as for the Cake goes we have never been one to do things traditionally. ;) Not one person asked where the cake was. It saved lots of stress, money, time and who wants all that sugar anyway. 


It still seems crazy that My Little Miss is now a wife.....I'm certain it was only yesterday that she was a little flower girl dancing on her Daddy's toes at her Aunt Shauna's wedding. Oh where or where does the time go!

Selasa, 08 September 2015

My Little Miss is Getting Married!

So I have been wanting to post about this for some time now and to share the exciting news .....hopefully most of you have already heard but I realized that I haven't really posted about it on my social media sites. Although some of you may have noticed "The Big Day" board that showed up on my Pinterest! ;) Other then that and my personal facebook page I haven't really shared much about it online.

It's all been kind of a blur.....I saw it coming but are you ever prepared for such a thing? Especially with your oldest child! For sure a new season for our family.....things have stayed relatively "the same" for quite a few years around here but about a year ago I told Ryan that although the last 5 to even 10 years have not had too many big changes the next 5 to 10 would probably be overflowing with many big changes!

Then back in the Spring when Missy and Oliver's friendship started turning more serious.....I text Ryan one day and said "Hold onto your hat" to which he responded with, "Live changes & sharp curves ahead....." I let him know that I thought it was a good way to put it and that I had been trying to prepare for this.

But really how do you prepare? I kind of took what Ryan said picturing a winding road and just sat down and buckled in! ;) It came in really handy about the time they announced their engagement and set a date that was only six weeks away!

The easily overwhelmed, can't have too much going on, never knows what PMS will do, likes to keep life simple, thinks busy is a bad word person came out it me and I started to panic.....not because this amazing couple wanted to get married but because I didn't know how I was going to pull it all together for them.

But luckily early on in the process I had a vivid memory of when Missy was just a baby.....a very fussy baby at that....and I was a very overwhelmed new Mom. Others would tell me to just enjoy the baby stage and how fast it goes by and I would think, "Are you kidding me, it can't go fast enough!" Well obviously it didn't take me long to realize all those words of wisdom where exactly that....very wise. I slowly learned to just take life and all it's messiness and just focus on the moment and enjoy the ride.

A later text to Ryan said, "This should be a very exciting happy time in our life. I'm not going to ruin it by being overwhelmed, depressed and anxious. I will try to take it one day at a time." And that is what I have done. Lucky for me I have an amazing practical daughter who likes things even more SIMPLE then I do.
Now the wedding is just a week away and I wouldn't be totally honest if I said we got here stress free. But it's been a fun ride and a super happy time in our life that I will look back on very fondly. We are all so excited to have Oliver join our family! We hope you will share in our excitement and consider this your official invite.....if your in the neighborhood next week stop by and say hello!

Rabu, 26 Agustus 2015

Fruit and Creamsicles

Oh goodness I certainly haven't done very much blogging this summer.....it's been full of lots of other exciting things that I hope to post about soon...ish! But before the last of the heat was gone (which is always too soon for me) I wanted to be sure to post these super yummy popsicles that we have enjoyed a lot this Summer.

I have loved how simple they are and that lots of fruit are super tasty with them.  We have tried cherry, peach and strawberry. But I also think blueberry, raspberry, orange, pineapple and other fruits would be super good too.


Fruit and Creamsicles

Fruit Part:
4 cups of favorite fresh fruit (frozen works too just mostly thaw first)
1/4 cup water
1-2 Tablespoons pure maple syrup or honey (optional)

Blend ingredients in blender till smooth.

Cream Part:
2 cups coconut cream (I use the thick stuff from the top of chilled canned coconut milk more info here)
1-2 Tablespoons pure maple syrup
1/2 teaspoon vanilla
a pinch of Real Salt

Mix or whip together.

To popsicle molds add a spoonful of cream and then some fruit. Layer or marble however you would like until molds are full. Freeze until solid. Enjoy!


Jumat, 17 Juli 2015

Strawberry Ice Cream Cake

Simple Strawberry Ice Cream Cake

Before I get into recipe talk you may have noticed a bit of a slow down in posts around here. I'm still creating recipes and the finished products will be posted here but more frequent updates and goings on are happening over at Instagram if you would like to join me there!

Some of you may not know this but I don't really love spending a lot of time in the kitchen. I love good food and family meal time.....but large messes and fancy gourmet food that takes a million steps and dirties a bazillion pans....that's just not for me.

I struggle with having a meal take much longer to make then it does to eat. ;) A few times a year for really special holidays I'll make a few exceptions but most of the time I want to be in and out and onto the more enjoyable things like gathering around the table and nourishing body, mind and soul.

Homemade Ice Cream Cake
I have always loved the idea of ice cream cake and thought they looked super tasty and like lots of fun. But whenever I would look at recipes it just seemed like too many steps and so much time. Remember I'm all about SIMPLE!

So I put off making one......until Curt started saying he wanted one for his Birthday.....I thought about just spending the time to make a real fancy one but then there was a funeral that I found out about the day before and other holidays right in the mix. So I had to just go with it and by design I just had to keep it as simple as possible. It turned out surprisingly good for being so simple. No fancy crust just a layer of Strawberries. When I make it again though I will go all out and add a layer of strawberries in the middle just for a pretty effect. ;)


Strawberry Ice Cream Cake


Strawberry Ice Cream Cake

Ice Cream Ingredients:
4 cans coconut milk
1 cup almond milk
1/2 lb. strawberries, washed and hulled
1/2 cup coconut oil
1/2 - 3/4 cup pure maple syrup (adjust to desired sweetness depending on how sweet strawberries are)
1 Tablespoon vanilla
1/2 teaspoon real salt
1 teaspoon guar gum (optional)

Other Ingredients:
1/2 lb strawberries, washed, hulled and sliced
1 recipe hardening chocolate sauce (will have extra for adding to individual slices)

In blender blend ice cream ingredients until smooth, you may need to blend for 2 or 3 cycles just be sure to blend on low and not more then three cycles as over-blending can separate coconut milk. Now freeze in ice cream maker. (Makes enough ice cream for two cakes or one cake and extra ice cream for the freezer.....the ice cream is super tasty all on it's own)

While ice cream is churning, line the bottom of a spring form pan with sliced strawberries.  Once ice cream is froze but still soft spread into pan (may fill half way and add more sliced strawberries or just fill to top and then "decorate" however you want with the rest of the sliced berries) Then freeze in freezer.....may make a few days ahead if needed.

About an hour before serving remove cake from freezer, make sauce. Remove band from spring form pan (I set the cake on a platter). Then drizzle sauce over cake and let harden then serve. May add extra sauce to individual slices.


Senin, 15 Juni 2015

An Update....Finally!

I know, I know.....It's been over a month since I have posted. (So much for tomorrow, huh!)  I took a much needed, spontaneous blogging break. I have spent some time thinking about what I really want to be sharing here on my blog. I like sharing my meal plan but it was starting to seem a bit redundant to me and I have a few other meal plan ideas swimming in my head that may be something worth sharing on the blog as I get them working.

If they prove helpful I will share.....in the meantime there is over a years worth of weekly meal plans in the Menus category.  Some of my thoughts have leaned toward batch cooking, freezer meals, master shopping lists that include shopping then meal planning, 30 minute meals and other things along those lines.....I guess we will see what materializes.

I still want my blog to be a history of sorts where I share some of our everyday life mostly for posterity..... and of course lots of recipes because those are just meant to be shared.

I do have some fun ones almost ready to share and even more in the works but one thing I learned on my break is that I enjoyed not spending large amounts of time putting together posts. So know that updates and blog posts may come less frequently. But don't worry I will always share our favorite recipes. 

A photo posted by Tammie simplehealthytasty.com (@simplehealthytasty) on


I have been getting more regular about posting on Instagram so if you are wanting more frequent updates follow me there! I will try to keep my other social media sites posted on and updated too but I make no promises. (Find the other links on the fruit icons at the top right (your right) of this page.

So how about a few highlights of the past month!


I had the most awesome Mother's Day weekend! Ryan and I spent it up the mountain where we watched Bald Eagles, snow fall and things. Just taking in the peace and calm and feeling so very rejuvenated......Coming home on Mother's Day to spend some time with those sweet children who call me Mom!


I heard all about their weekend (specifically Missy's first "real" date with this particular boy she has know for quite some time now....they have since had many, many more dates ;) Charly had a whole bunch of gifts that she had made and I just drank in the moment trying to savor as slowly as possible because I see so much change and growth coming on so quickly.


We also celebrated Curt's birthday this past month. He wanted his usual Burrito Casserole dinner but this time he wanted to go bowling and have ice cream cake. This was my first try at any sort of ice cream cake and I had too keep it quick and simple since we where also in the middle of trying to get the garden all planted too. It turned out well though and everyone said they liked it. I will share the recipe soon!

Senin, 11 Mei 2015

My Weekly Meal Plan


Last week was great much needed rain and snow and everything has greened right up. I have some pictures and other fun memories from the weekend....that I will post here tomorrow. I just wanted to be sure to get the meal plan up today!


My Weekly Meal Plan

Monday:
Roasted Veggie Bowls

Tuesday:
Tacos

Wednesday:
Sweet and Spicy Cabbage

Thursday:
Baked Potato Bar

Friday:
Quinoa, Potatoes and Steamed Veggies

Saturday:
Leftovers

Sunday:
Mushroom Stroganoff

Senin, 04 Mei 2015

My Weekly Meal Plan


I didn't take many pictures this week and if there are any it seems that something is wrong with my memory card and I may have lost them.....hopefully not but if so it will remind me that I better be backing up my pictures more often.

Last week was a pretty fun week with lots of outside time. Lots of weeding, watering and working more on the garden. We are getting very excited about our wall/fence getting finished but still waiting.....they said next week two weeks ago....you know how that goes. ;)

Ryan took the boys camping on the annual Father's and Son's camp out. It sounded like they all had a good time. Missy text Matt on Saturday night to see if he wanted to come hang out and play games with their group of friends. He had been telling her that he was missing that since it hasn't happened as often since she moved out.

He was excited to go and said he had a great time. I'm so glad they have such a good friendship with each other.


My Weekly Meal Plan

Monday:
Flatbread Falafel Sandwiches

Tuesday:
Minestrone Soup

Wednesday: 
Quinoa Stir Fry

Thursday:
Sukiyaki

Friday: 
Black Bean and Sweet Potato Taco Packets

Saturday:
Leftovers

Sunday:
Philly Cheese Steak, My Way

Kamis, 30 April 2015

Gluten Free Pancakes

Recently I went gluten free for a few months as part of an elimination diet type cleanse thing. I even went without grains for part of that time not because I think they are not healthy but because I wanted to see if I had any sensitivities to any of them. The only big thing I noticed without them was feeling a bit bound up if you know what I mean.

I still have not added back wheat yet, it has been a slow process and I'm trying to listen to my body. I have added back non-gluten grains and some Spelt but only in sprouted or sourdough form.

Anyway as I was adding back other grains I wanted to try some gluten free pancakes. Most of the ones we tried where not good at all and really soggy in the middle and just......yuck. But then I tried using the almond pulp from making almond milk and this is what I came up with. I don't think they are as good as our regular pancake recipe but they are pretty tasty and if you are wanting a gluten free pancake it's the best one I've tried yet!


Gluten Free Pancakes
1 cup almond meal (I just use all the leftover almond pulp from making this almond milk)
1 cup brown rice flour
1 cup oats
3 Tablespoons arrowroot powder
1 Tablespoon baking powder
1 teaspoon lemon zest
1/2 teaspoon cinnamon
1 teaspoon Real Salt
1/2 cup almond or coconut milk
1/2 cup water
1/4 heaping cup coconut oil, melted
2 free range eggs
1 teaspoon vanilla
2 Tablespoons honey or pure maple syrup


In medium size bowl add the first 8 ingredients. In separate bowl, whip up eggs and add then whisk in the rest of the ingredients. Add the wet ingredients to the dry until just combined add more water if needed for desired batter thickness. Heat up slightly oiled griddle or frying pan. Using a ladle pour batter onto the griddle. Be sure to cook well on each side at not too hot of temperature to be sure they cook in the center. Serve hot with favorite pancake toppings.

Note: You could try these with egg replacer but I have found that when you are not working with gluten to help hold things together egg replacer just doesn't give it quite a sturdy enough texture. More mushy and crumbly at the same time if that makes any sense.

Senin, 27 April 2015

My Weekly Meal Plan

We got some much needed rain last week along with plenty of wind (not sure about the need level there). It got pretty cold this weekend which is why we always wait until after the 20th of May to plant anything that can't take frost because around here we can get a late frost.


Because of the rain outside, Ryan did a little gardening indoors. I'm trying to learn more about Instagram since Missy has her own phone now and doesn't take mine. But I'm not very familiar with it. If you can't see the picture you can find it on Instagram here.

We have been surprised at how well our seeds have germinated. The seeds we have are easily over 5 years old....probably closer to 8 and we seem to be getting nearly 100% germination with most things.


On Saturday we went and celebrated my Grandpa's baby Sister's 99th Birthday. On her 90th birthday someone asked her if she would make it to 100 and she told them to not say such negative things. This birthday when asked.....she said that she probably will.

She is a funny and spunky lady and I sure love her. Sometimes she says that she is sure Charles (her deceased husband) must have a girlfriend up in Heaven because she is taking so long to get there. I'm confident though that he's just "Waiting on Her (a Woman)".


Missy and Kenzi came over for dinner last night. It's so fun to see how excited all the kids are to see them whenever they come. It has been an adjustment but I think it has been good for all of us. Change can be hard but I see growth happening in all of us. Fun times!


My Weekly Meal Plan

Monday:
Mushroom Stroganoff

Tuesday:
Tacos

Wednesday:
Sweet and Spicy Cabbage

Thursday:
Baked Potato Bar

Friday:
Loaded Veggie Nacho Soup

Saturday:
Leftovers

Sunday:
Black Bean and Sweet Potato Taco Packets


Mint Chip Ice Cream


Not sure why this recipe took me so long to perfect but it was worth it! Way back in the day when Ryan and I first started dating, I thought it was pretty cool that his Mom always made sure there was ice cream in their freezer. One day she asked me what my favorite kind was and I remember telling her mint chip.

Now I'm not sure why I told her that because really most any kind of ice cream I liked. Back then I think I would have even ate that blue bubble gum kind with gum balls in it. (Does anyone else remember that and do they still have it? YUCK!) I think it must have been before cookie dough ice cream though so mint chip probably was my favorite at that time.


Anyway a few months ago I was thinking if that was my favorite way back then....how come I haven't come up with a heathified recipe for it yet? Well I have been working on that recipe ever since and it took me quite a few tries. I wanted it to be just the right texture and flavor. And honestly I wanted to make it honey sweetened but not too sweet.

I also added quite a bit of vanilla because I didn't want an overly strong mint flavor. I also think next time I make it I will use my version of Magic Shell (leaving out the peanut butter) and drizzle is through the ice cream for the "chips" instead. I think that will be really good and Ryan agrees. ;)

Note that you can make it in an ice cream maker or not. Most of the times I tried the recipe I didn't use my ice cream maker. It will work well either way. I hope you enjoy this recipe I worked really hard on it.


Mint Chip Ice Cream
1 cup raw cashews soaked in
1 1/2 cups water
1/2 cup coconut oil
1/2 cup honey
2 cans coconut milk
1 small handful spinach
1/2 teaspoon Real Salt
1 Tablespoon Vanilla
5-8 drops peppermint essential oil
1/2 teaspoon guar gum (optional)
1/2 - 1 cup carob chips (may coarsely chop)

Soak cashews in water for at least 2 hours or more. To your blender add the cashews WITH the water, the coconut oil, and honey. Blend until smooth. Add the coconut milk, spinach, salt, vanilla, peppermint and guar gum. Blend on low until smooth for not more then 2 minutes. (If you blend too long or too fast the coconut milk will separate so be aware.) As soon as it is well blended pour it into a cake pan with a lid (I like my glass pyrex one for this) and put into the freezer.....Set your timer for one hour then stir in the carob chips. Then let finish freezing at least another hour or more. After frozen solid you will want to sit it out for about 20 minutes before scooping it up and serving.

You can also freeze this in an ice cream freezer just follow directions for your ice cream maker. ENJOY!

Kamis, 23 April 2015

How to make your own Curry Powder


I don't think I had curry anything as a kid growing up but at
some point in my adult life Ryan and I both decided that we really like curry. It doesn't matter what kind of curry, we think Indian Curries are fabulous (on my list of recipes to perfect) we also just love Thai Curry.

There are a number of recipes here with curry powder:

Sweet Potato and Chickpea Curry
Curried Lentils over Rice
Curried Cauliflower with Sweet Potato and Black Beans
Spicy Pumpkin Soup
Cauliflower and Curry Soup
Curry Dip

Although I was able to find some pretty decent curry powders to buy that contained all good ingredients......I had to order it I couldn't just go pick it up at the store. One day I was in the middle of making dinner and realized I was out of Curry Powder.....I don't know how I let that happen I buy most everything in bulk and rotate through and don't very often totally run out.

But I did.....it was okay though because I had been thinking about trying to make my own anyway. So I quickly put together a small batch so I could finish making dinner. I was so surprised that it smelled and tasted very much like the powder we liked so well.


Homemade Curry Powder
12 parts turmeric
2 parts Real Salt
6 parts Sucanat
6 parts cumin
3 parts coriander
2 parts white pepper
1 part cayenne
1 part mustard
1 part paprika
1 part ginger
1/4 part fennel
1/2 part allspice
1/2 part garlic

Combine all ingredients and combine well. You can choose how big you want 1 part to be depending on how much you want to make. I usually use a Tablespoon to 1/4 cup. For example is you use a Tablespoon then just put Tablespoon in place of part(s) in the recipe. Simple as that!


Selasa, 21 April 2015

Dry Shampoo and Face Powder in One

I discovered this by accident one day.  You see Missy and I had both seen face powder made with cornstarch and coco powder and other spices and thought we would try our own version. So we made up a small batch and tried to made a pretty good match to our skin tone.

We both really liked it but since I only wear make up once in a while I didn't notice when it was missing from my bathroom. On day I was having one of those days where my hair didn't really need washing but for some reason it had a little extra oil at the roots so I thought a dry shampoo would come in handy.

Then I remembered the face powder but I couldn't find it.....I asked Missy where it was and she came up with a nearly empty container from her room. There was just enough to try it out. So I took a powder brush and rubbed it in at the roots then brushed through it.

I was quite happy with the results the powder absorb any greasy look my roots had and even though it was a bit lighter then my hair color I actually liked that it seemed to kind of give some natural looking highlights to my hair and guess what else........it seemed to hide the grey that has been starting to accumulate! ;)

I made a note to self that when and if the grey gets out of hand this may be a better option then trying to color it.  Either way though it works great as dry shampoo and/or face powder.


Dry Shampoo & Face Powder In One
Arrowroot Powder
Carob and/or Cocoa Powder
Cinnamon
Nutmeg

In a jar add some arrowroot powder (I used about 1 cup you can use less if you aren't sure how you will like it) then just add a few Tablespoons of Carob or Cocoa powder until you feel it is almost you skin and/or hair color (to add highlights and help hide gray keep it a few shades lighter then you hair color if you are blonde maybe you could try spices with more yellow tones not sure how it would work though)

Then add a little cinnamon and/or nutmeg to get just the color you want. If using on your skin don't overdo the cinnamon (not more than a teaspoon or 2) or it may kind of create a burning sensation when applied to the skin.


Mother's Day Gift Ideas!

If you're like me you are always wondering what to get for Mom for Mother's day!  I'm mean really what do you give the Woman who gave you life and raised you and kept herself from strangling you as a teenager!  Well hopefully this post can help you with a few ideas and at least get the wheels turning.

Being a Mother now myself, I do know that Mom really did mean it when she said the only thing she wanted was for me to be good and be the best person I could be!  But if you want something you can wrap..... stick around! ;)

What Mother doesn't want soft, beautiful, wonderful smelling skin! 
How about we start with recipe. I make this recipe as soon as I run out of the last batch!
It's wonderful.

I adapted the recipe from the book, Rosemary Gladstar's Herbal Recipes for Vibrant Health.....which would make a nice gift itself by the way!  You can put them in any little jar make it cute.  And don't worry the recipe will make enough for you to keep some for yourself too!


Nature's Perfect Skin Cream
2/3 cup distilled water
1/3 cup aloe vera gel
Essential oils of choice
3/4 cup sweet almond oil
1/3 cup coconut oil
1 ounce beeswax (about 4 Tablespoons of the pastilles)

Combine the water, aloe and essential oils in a glass measuring cup, let sit until room temperature.  In a double boiler over low heat melt the beeswax, coconut and almond oil together, mix well.  Pour oils into blender jar, let sit until about room temperature.  When oils are about room temperature, turn on blender and slowly start to pour in the water mixture.  Speed up blender and be sure it mixes well.  You may have to stop the blender and stir with a spoon and then pulse the blender a few times.  It should blend and incorporate well.  Water and oil can sometimes be tricky to mix but if you follow these instructions and have a fairly high speed blender it should work really good!  Mine whipped up perfect the first try!  There are a few pictures below to help you out too!


This is what the oil mixture looks like at almost room temperature.

This is me slowly adding the water mixture while the blender is spinning fast!

See how beautiful the cream turned out! 

To be sure not to waste any we wiped out the blender and all had super soft skin! ;)

What Mother wouldn't love that!


The cream would be a wonderful gift by itself or you could add some of these other things a make a very fun gift basket or box!

Fizzy Bath Bombs
Herbal Infused Oil and/or Lip Balm
Hard Lotion Bars


Labels?  You betcha! 

See how good I am to you all! ;)


We even made the gift box ourselves!  Fun huh, you can find the instructions we used here!